Before we begin automating Pardot RSS emails we have to create the necessary Pardot lists and campaigns. Pardot lists will allow us to group all of our subscribers together. Creating a single Pardot campaign for our RSS email will allow us to report on our RSS email's engagement; clicks/opens... over time.
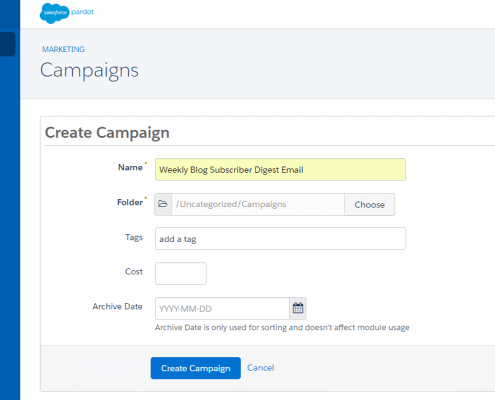
If you already have a list or dynamic list in Pardot that contains your subscribers you can skip this step.

Before you can begin automating RSS emails with Pardot you will need to find the data source: an RSS feed.
Many websites have a feed tag that can be appended to the base url. An example is any website built on WordPress where the RSS feed typically looks like this:
https://website.com/feed/
https://website.com/category/feed/
https://website.com/tag/feed/
Where "feed" is appended to the end of the website, blog, category, or tag URL.
If your website is running on Drupal or Expression Engine it might look like this:
https://website.com/blog/rss.xml
If you still are not sure here are some additional resources we have published on finding RSS feeds:
How to find an RSS feed for any website:
https://www.feedotter.com/blog/find-an-rss-feed-url/
WordPress RSS Feeds For Categories and Tags
https://www.feedotter.com/blog/wordpress-rss-feeds-for-categories-and-tags/
Finding Your HubSpot RSS Feed
https://www.feedotter.com/blog/how-to-find-your-hubspot-rss-feed-url/
How to Find You Uberflip RSS Feed
https://www.feedotter.com/uberflip-email/
Login to your FeedOtter account and navigate to the Automated Emails module by clicking on the top navigation bar.
Click New Automated Campaign to create a new automation.
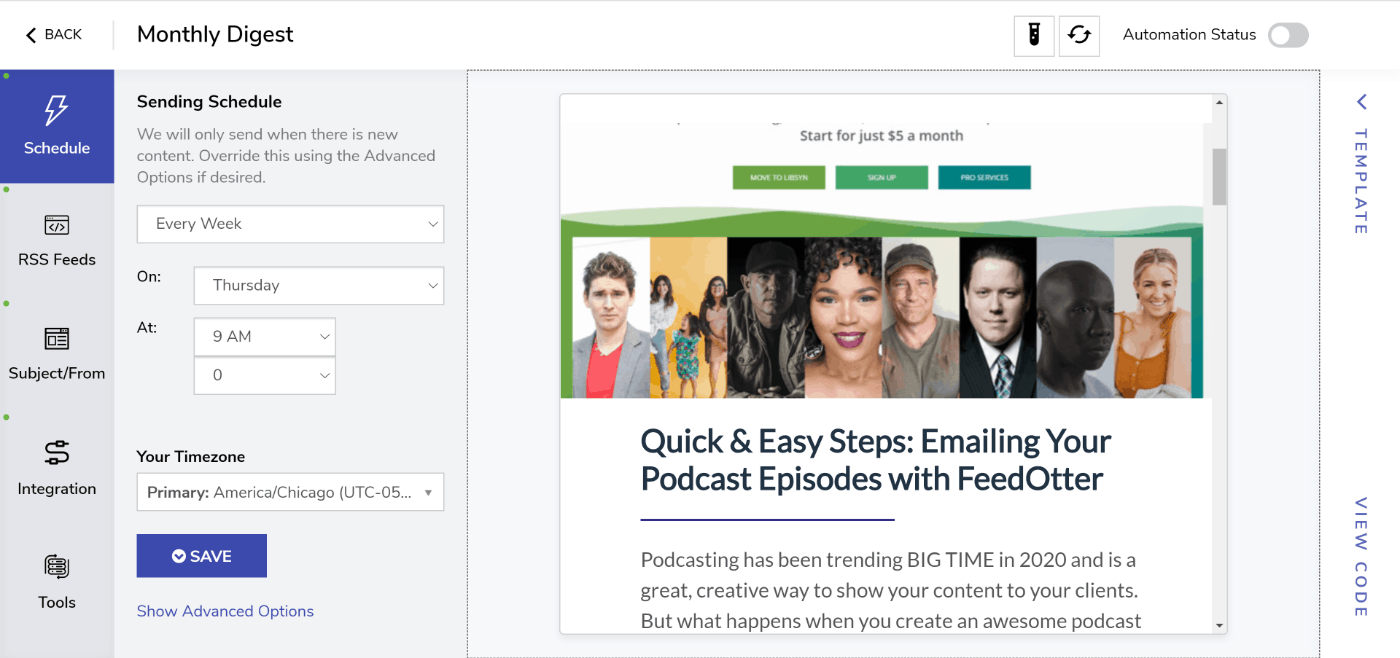
We have setup our Pardot RSS email to automatically send every week, on Thursday at 9am CT. By default, FeedOtter will only send an email when there is at least one article of new content. This behavior can be altered via the Advanced Settings area. Here you will find options to send every other week, quarterly, or to include old content.
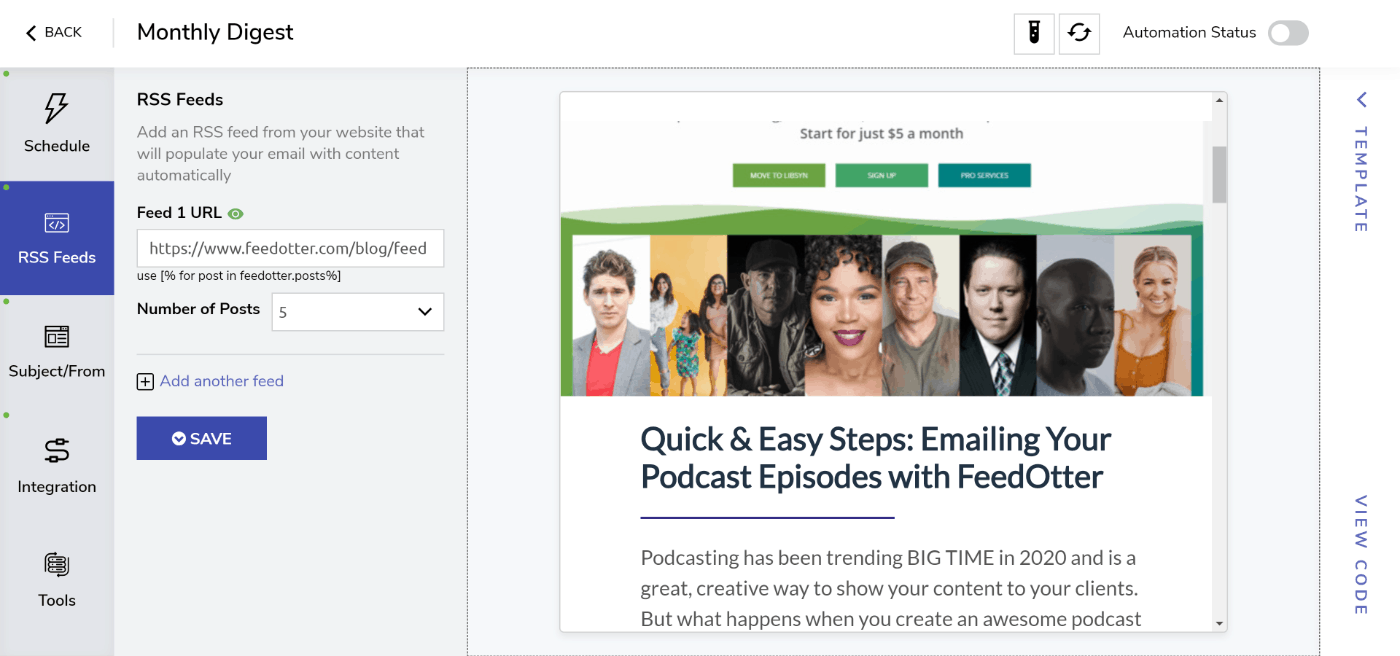
If you haven't already, find your RSS feed URL and paste it into the appropriate box in the FeedOtter interface.
FeedOtter supports any valid RSS/Atom/XML datafeed. In addition, FeedOtter supports adding multiple RSS feeds which can be combined into 1 content stream or used to create complex multi-section newsletters automatically.
If you’re not sure if your RSS feed will work with FeedOtter we recommend using https://validator.w3.org/feed/ to ensure your feed is valid. Any valid feed will work with FeedOtter.
Here, we also told FeedOtter to display 5 posts with each email send. This means FeedOtter will only send up to 5 new posts in your email.
At this point an email preview has likely appeared showing your content. We will talk about email templates and how you can use a custom email design in a moment but we need to finish setting a few basic email details first.
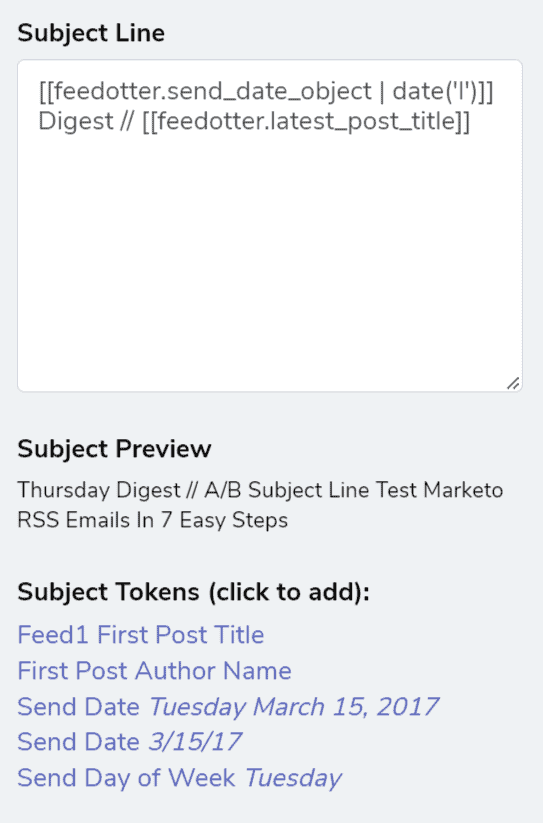
Click on the Subject/From button on the left menu. Enter in the From Name, From Email, and Subject text you wish to use for your automated emails.
Since our emails will be automated there are special features that will allow us to more easily make our subject lines interesting.
Here we use the special FeedOtter tokens listed below the subject box to insert dynamic content data including the title of the most recent post and the day of the week. The subject box also supports plain text and Pardot tokens.
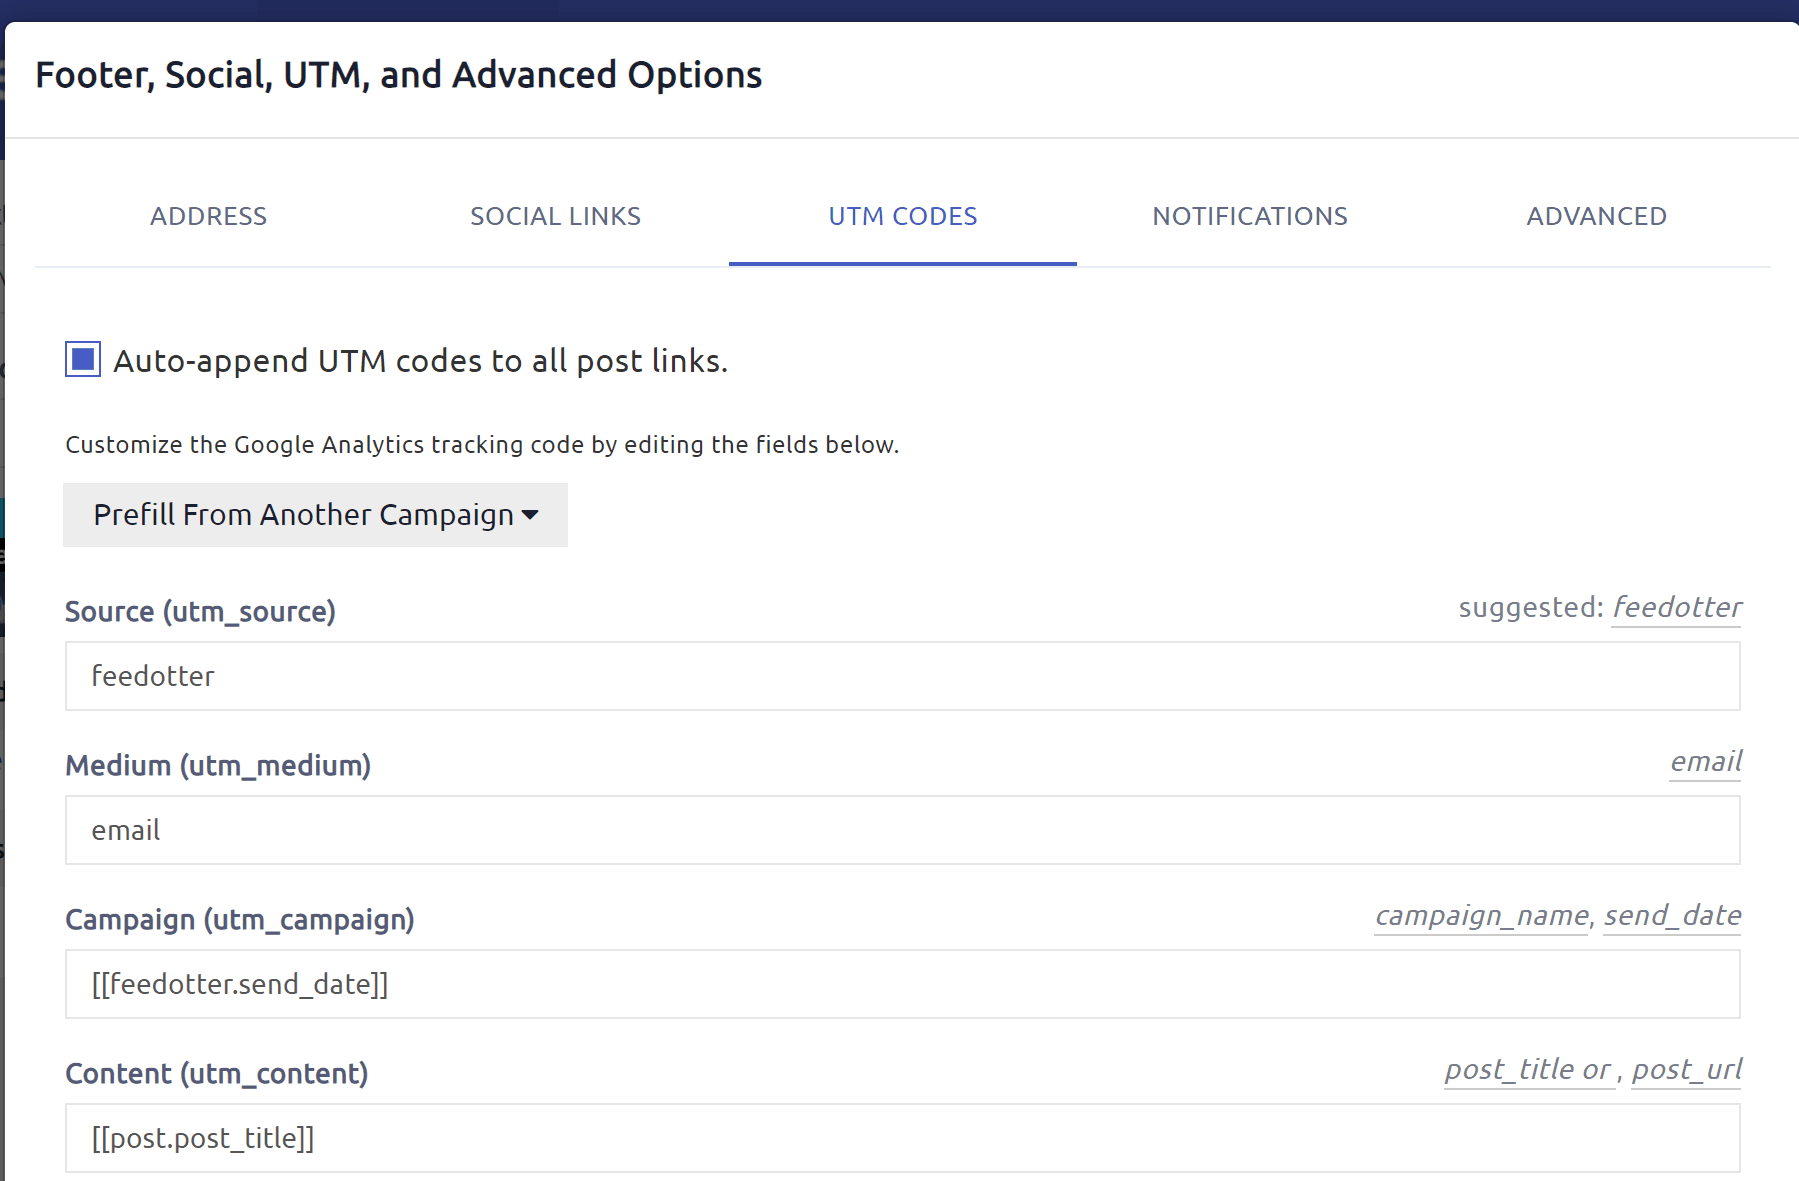
When using FeedOtter for Pardot your email metrics; opens, clicks, engagement will be accessed in Pardot via the campaign and email reporting function. In addition to these metrics you will want to track the amount of website traffic promoting your blog content generates on your website. This is done by using our UTM feature combined with a website analytics tool such as Google Analytics.
FeedOtter has a built in feature that will automatically add the correct UTM parameters to your content links. This feature is on by default but can be customized as need be.
To setup/view the UTM settings:
Here you can update the settings as need be or turn off the feature entirely.
The last step before we dive into the Pardot connection and selecting your email's audience is to finalize the look and feel of your Pardot RSS email.
We have included several great options for users that need a great looking template quickly as well as those who have email design and coding resources and wish to use a custom HTML email design.

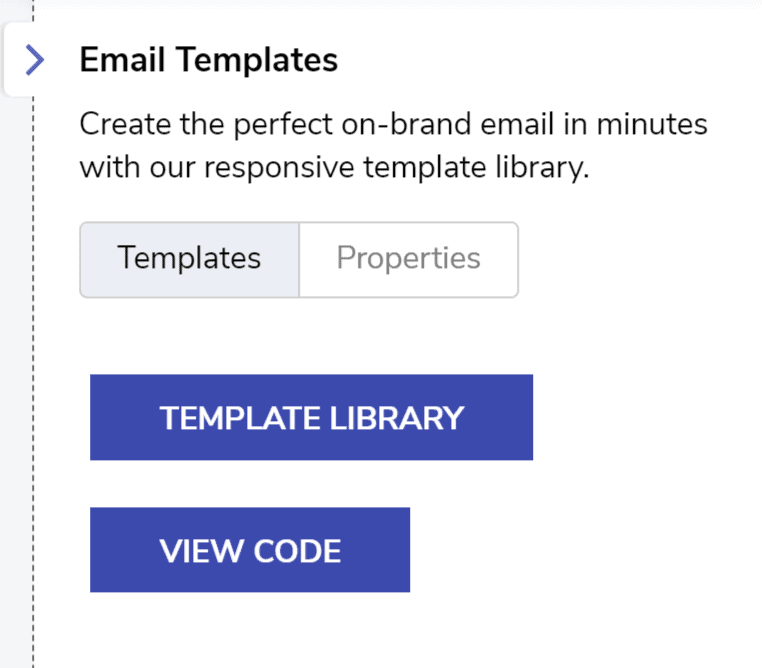
Here you can view the current template's code, select a new template from our library, or customize colors and images in the currently selected template.
From here you can click on Template Library to view and select a great looking template from our built-in templates. If you don't see a template you like you can upload your custom HTML email and our team will import it into your FeedOtter account. When imported your custom template will also appear in the Template Library.
If you would like to learn more about using a custom HTML template with FeedOtter visit our guide.
When you are done with the campaign setup its time to publish your new automated RSS email to Pardot where we will complete the last step of setting up our email audience.
Click the Integration tab button in the left column of your campaign window.
If you have previously setup a Pardot connection in your FeedOtter account you can select it from the dropdown. Otherwise, click the Add a Pardot Connection button.
Integrating Pardot with FeedOtter requires using the Salesforce Pardot SSO. Here is the basic auth flow:
At this point you will be returned to FeedOtter and your connection should be setup and ready to go.
Please refer to the complete Salesforce Pardot SSO guide here:
When you have completed the above steps you will be presented with an interface that allows you to select the following:
A Pardot Campaign
This is the campaign we setup earlier. Start typing to search and select it.
Pardot Lists & Suppression Lists
Here you can select which lists will receive your email and which ones should be suppressed.
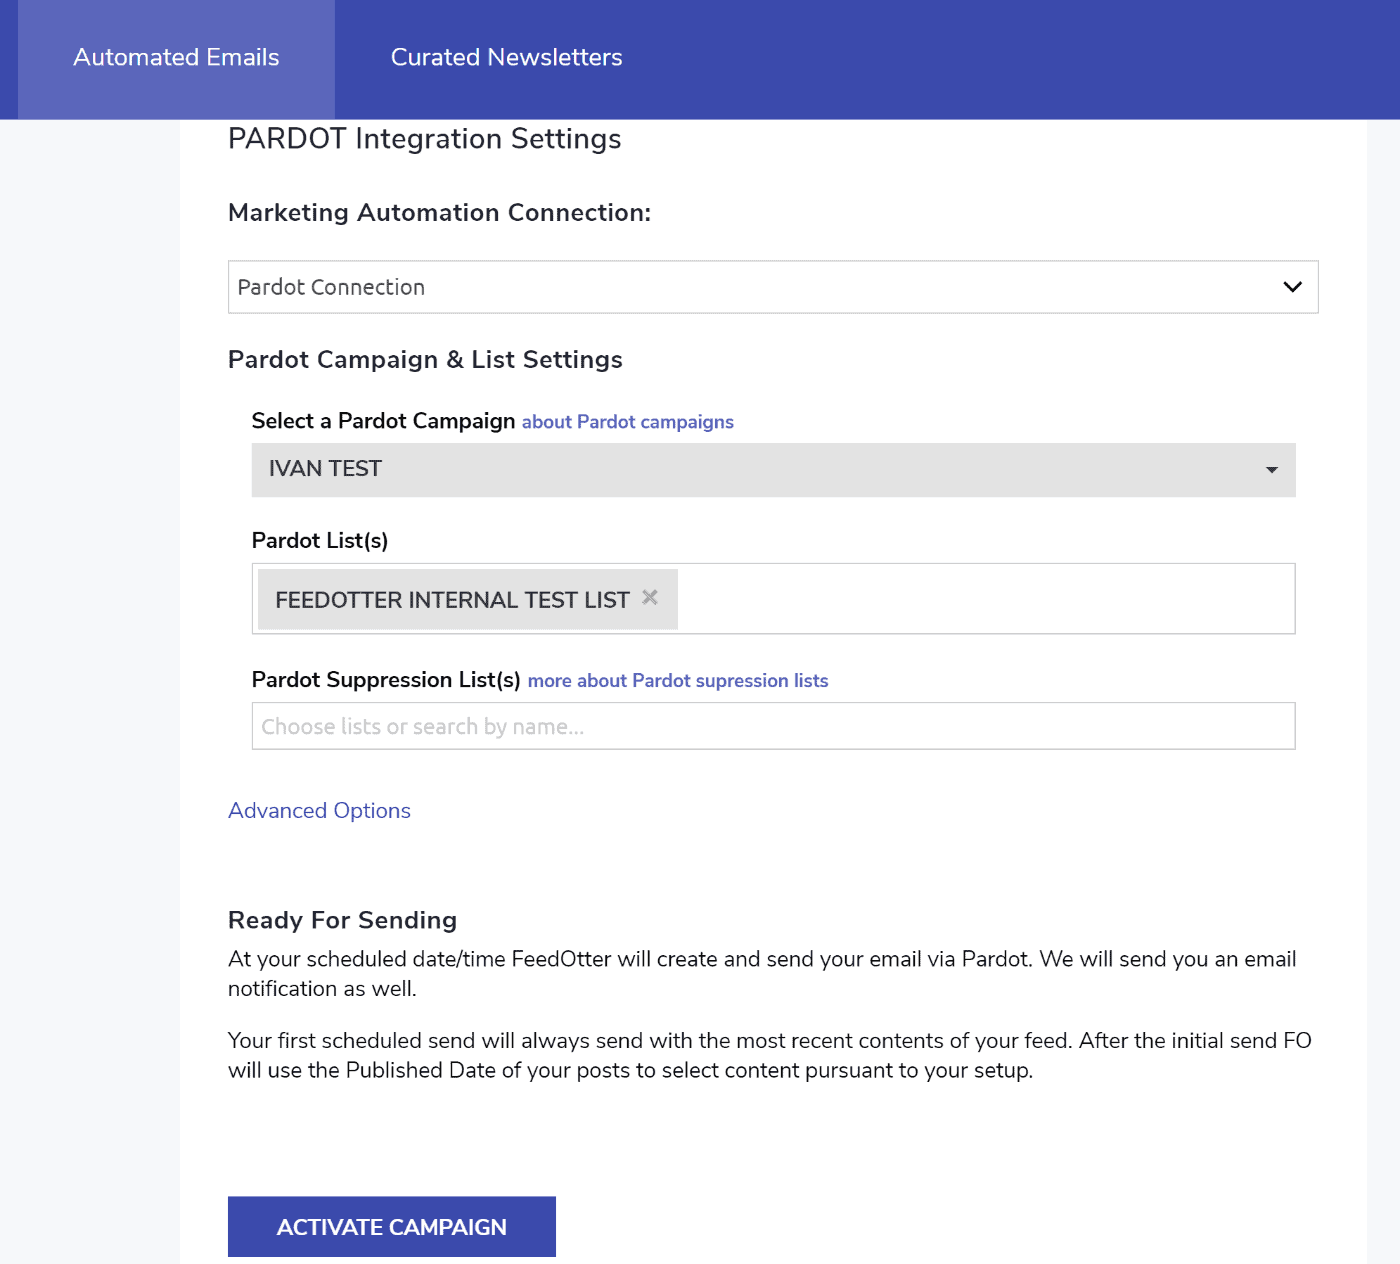
Click the Save Settings and Start Campaign button to complete the setup.
Now that you've started your Pardot RSS email campaign in FeedOtter. You can view, pause, and interact with your automated RSS email from the dashboard.

When the next scheduled send time is reached, FeedOtter will pull content from your RSS feed and compose a new email in Pardot.
This email will be scheduled to send. Sending will begin as fast as Pardot can process the email.
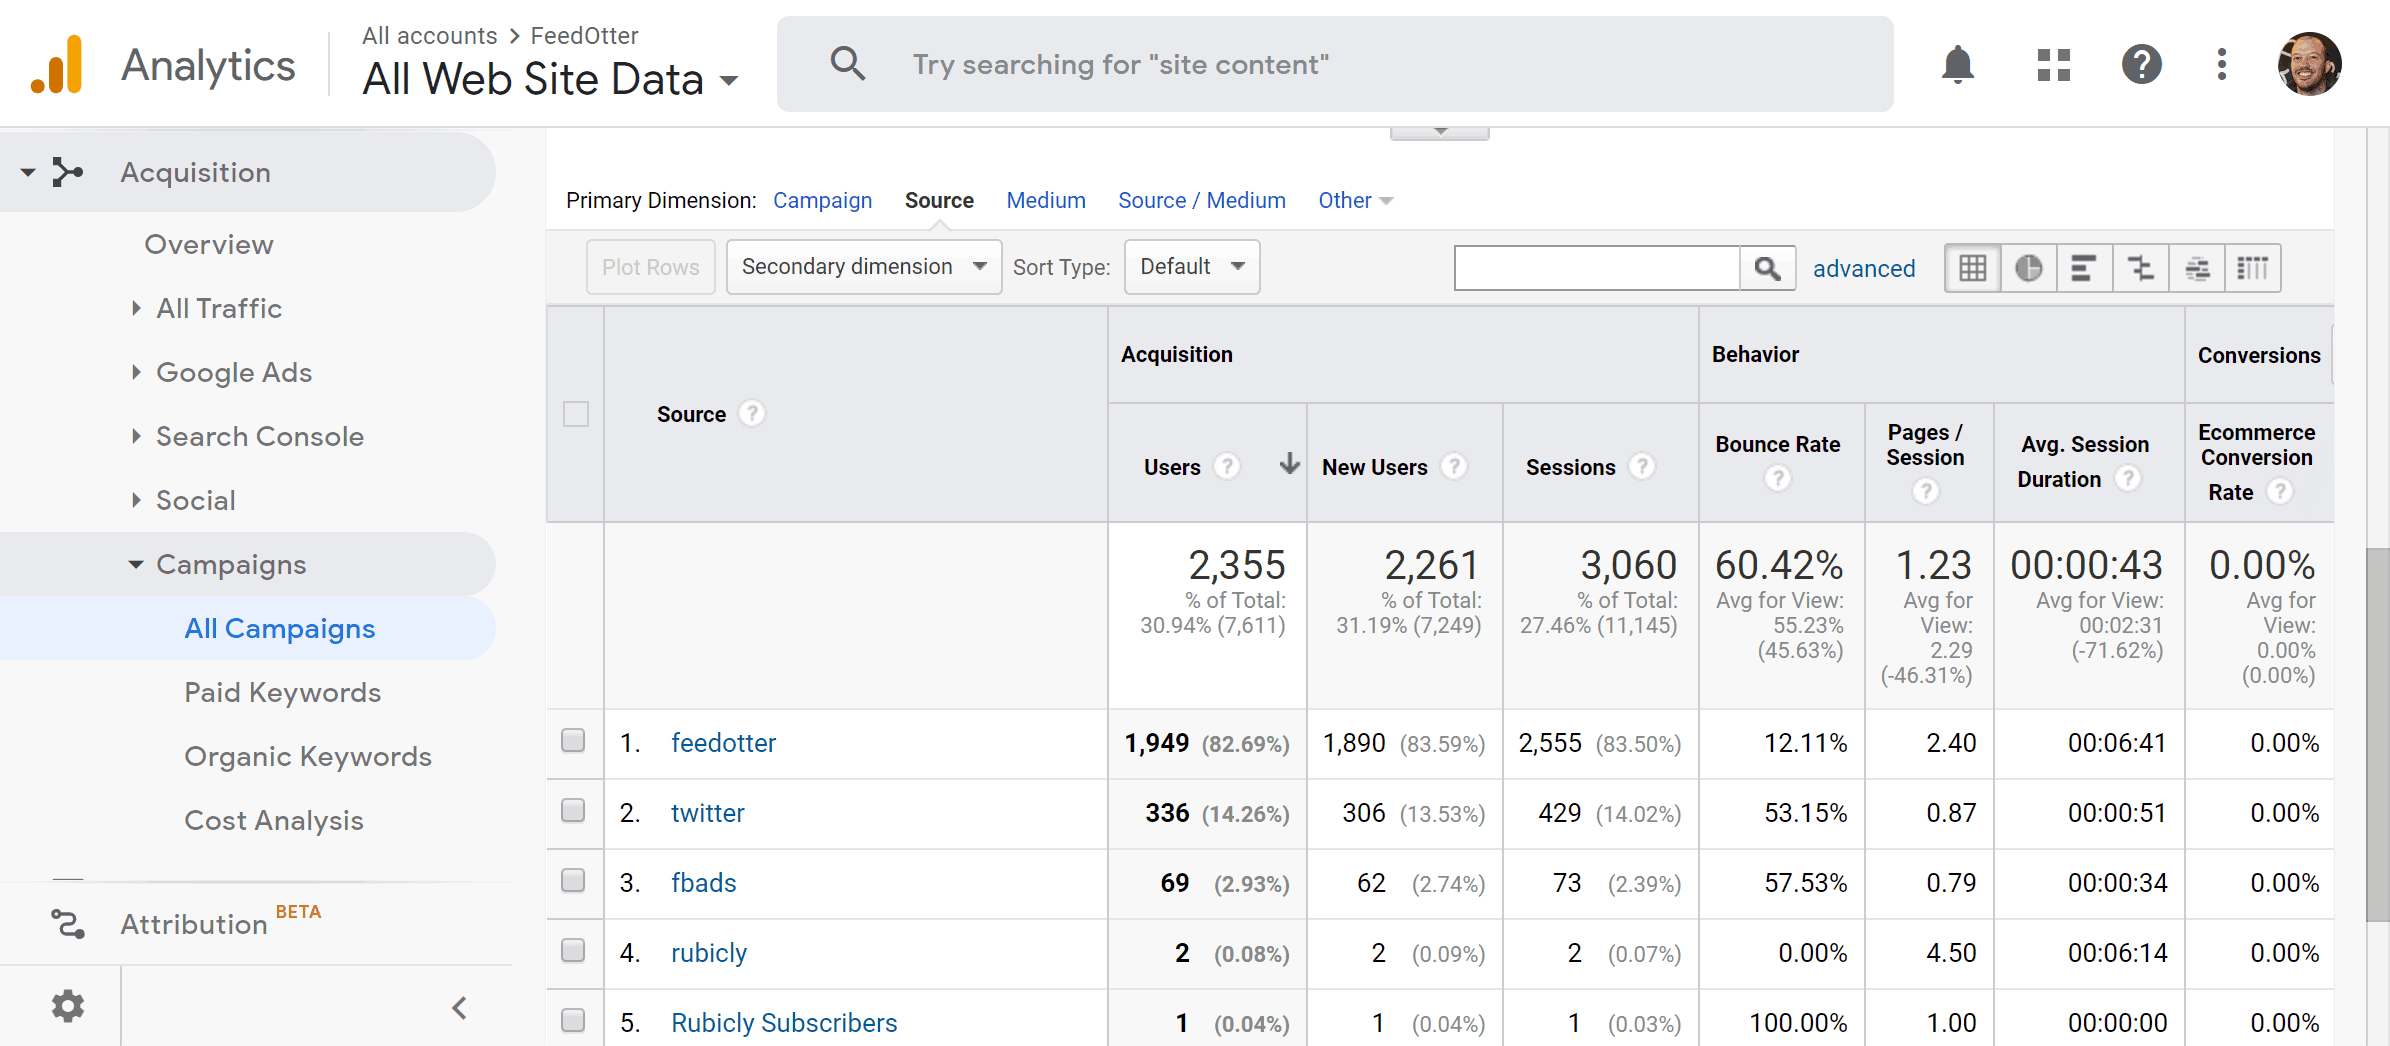
One of the most overlooked benefits of having an automated Pardot RSS email is the increase in website traffic it can provide. Many Pardot users see a 5-15% increase in blog and website traffic just from a weekly automated RSS email.
If you turned on the UTM code feature earlier in this tutorial then you can follow these steps to view website traffic as it related to your RSS emailing.
Here we are looking for the utm_source value of "feedotter". If you are using a different utm_source adjust your clicking accordingly. Another way to view this is to select "Other" from the primary dimension line and choose "Campaign". Here you can look for the utm_campaign code you setup in FeedOtter. If you used one of the FeedOtter defaults this will be the name of your FeedOtter automated email campaign.